一、前言
当我们正式开始工作生涯后,最先发现商业项目和我们自己写的项目的不同之一就是:怎么这么多配置文件啊!!
就按照最普遍的:开发、测试、预发(仿真)和线上来说,一个项目就至少有四套配置了,那么我们到底要如何配置多环境呢?
二、Multiple Application
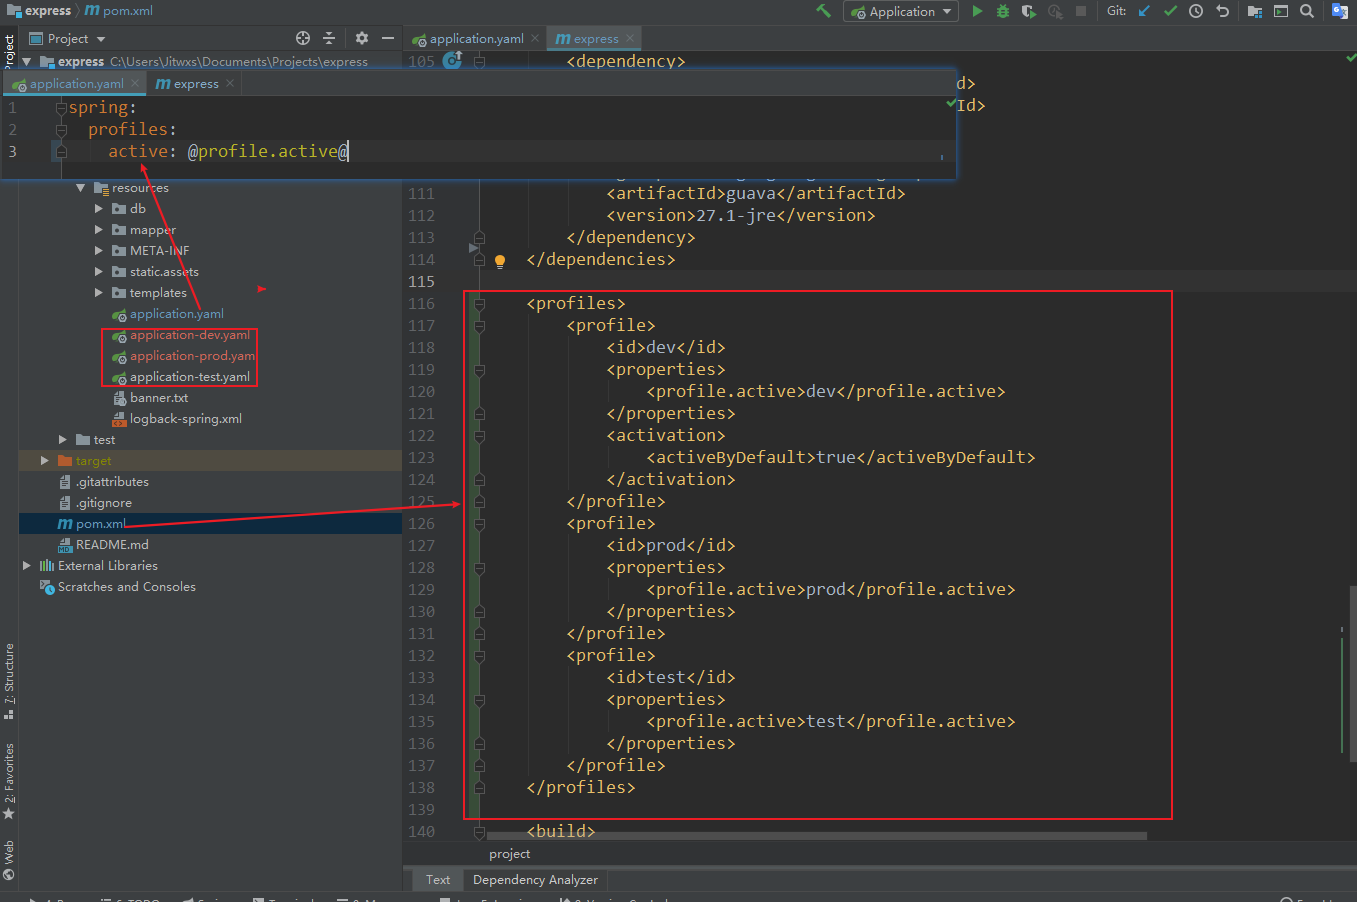
目前使用比较多的是配置多个 application-{profile}.yml 文件的写法,一张图就能解释清楚了,如下图所示。
首先配置不同环境的 application 文件,在上图中我配置了以下环境:
- application-test.yml
- application-dev.yml
- application-prod.yml
application.yml 文件用于配置各个环境通用的配置,在这里我指定了程序使用的 profile,即 spring.profile.active 属性,它的值决定了具体使用的配置。
例如 spring.profile.active=dev 时,使用 application-dev.yml + application.yml 的配置。
你可以看到,这里的值我设置的是 @profile.active@,这个值在 Maven 编译时会被替换掉。
如果在这里硬编码写死了某一个环境,那么本质上和一套配置文件没有区别,都得改代码。为了彻底解耦,在 pom 文件中,加入 <profiles> 相关配置:
1 | <profiles> |
每一个 <profile> 标签就包含了一个 profile,通过 <id> 唯一命名。<properties> 标签中包含了多个属性,在这其中指定了 profile.active 的值。<activeByDefault> 表示这是默认的 profile。
Maven 进行打包的时候,通过 -P 参数指定 profile 值(也就是上面代码中的 id),例如使用 dev 环境打包:
1 | mvn clean install -DMaven.test.skip=true -Pdev |
三、Maven Filter
进入正文,存在另一种多环境配置文件的策略,它利用了 Maven 的 filter 机制,如果说多 application 的特点是“一个主application,多个子application” 的话,那么它就是“一个 application,多个 properties”了。
展开来说,一套环境就是一个 properties 文件,application 中不含具体的配置,而都是占位符,Maven 打包时候通过具体的 profile 将 application 中的占位符替换掉。
3.1 基础配置
直接看代码吧,假设 application 中存在一个属性 app.name:
1 | app: |
记住,多环境的配置,在 application 中都是占位符的存在。
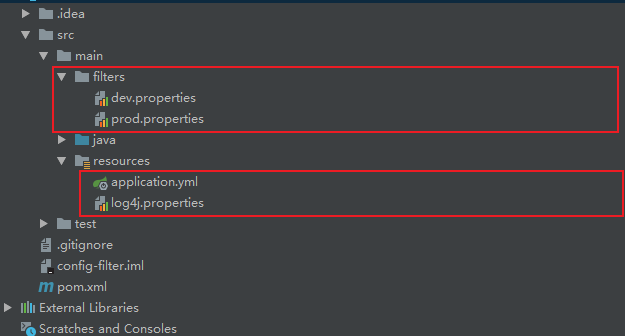
然后在 src/main 目录下创建 filters 文件夹,和 java 文件夹保持平级,在其中创建两个文件:
(1)dev.properties
1 | =env-dev |
(2)prod.properties
1 | =env-prod |
为了演示 Maven <resource> 标签的作用,在 resources 目录下建一个文件 log4j.properties,模拟 log4j 的配置,内容为空即可。
3.2 Pom.xml
编辑 pom 文件,首先加入 <profiles> 相关配置:
1 | <profiles> |
和上一节代码基本类似,唯一不同的是 <properties> 中指定了一个名为 <props> 的属性,它的值为该 profile 的 properties 文件路径。
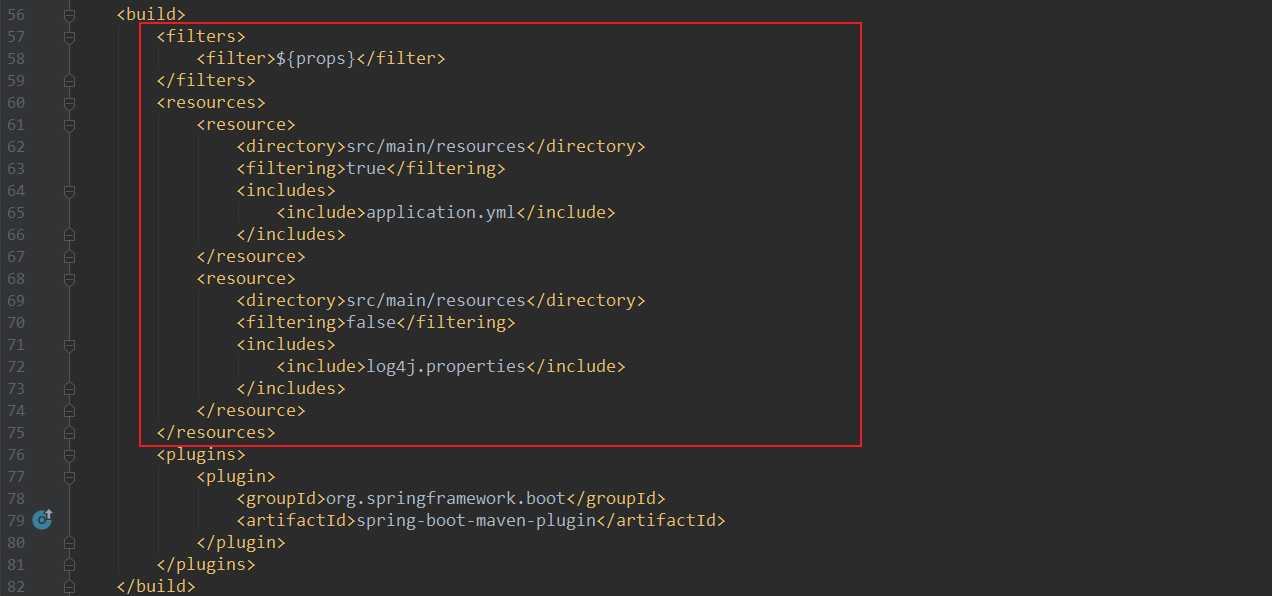
然后修改 <build> 节点内容,下图中,红框内为新增部分:
1 | <filters> |
首先介绍下 <filters> 标签,你可以认为它指定了用于填充占位符的源文件,你可以配置多个 <filter>,但是只有最后一个会生效,因此一般情况也只会配置一个。代码中这里的值为:${props}$,也就是之前配置 <profile> 时指定的 properties 的路径。
<resources> 标签指定了资源目录,<filtering> 标签的值决定了是否要启用占位符替换。
首先分析下第一个 resource 块,<filtering>true</filtering> 表示启用占位符替换,占位符替换的源文件也就是之前的 <filters> 标签中的 $props$ 属性。
那么哪些文件需要被替换呢?在 <includes> 标签中包括的所有文件都会被替换,代码中就是 application.yml。
1 | <resource> |
下面来分析下第二个 resouce 块,resources 目录下绝大部分文件是不需要被替换的,通过指定 <filtering>false</filtering> ,然后将不需要替换的文件用 <includes> 包括。
1 | <resource> |
3.3 Resouce include
也许你会问,为什么我一定要写第二个 resource 块呢?这是因为只有在 resources 块的 <include> 标签所包含,才会被打进 jar 包。
如果你不写第二个 resource 块,那么你会发现打包后是没有 log4j.properties 文件的。
当然,你觉得我的其他配置文件不会有占位符,或者不和 application 中的占位符冲突,那么你也可以将两个 resource 块合二为一:
1 | <resource> |
当然这样也是可以的,只是不太优雅。
3.4 Running
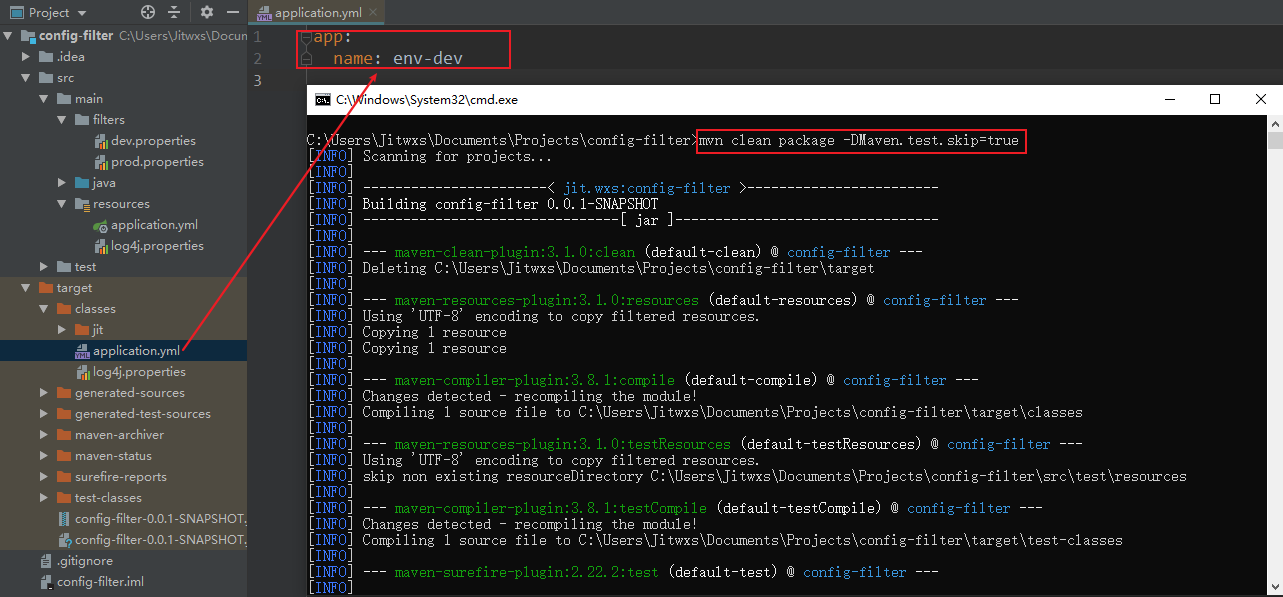
运行程序,由于 dev 环境配置了 <activeByDefault>,当不指定环境打包时:
1 | mvn clean package -DMaven.test.skip=true |
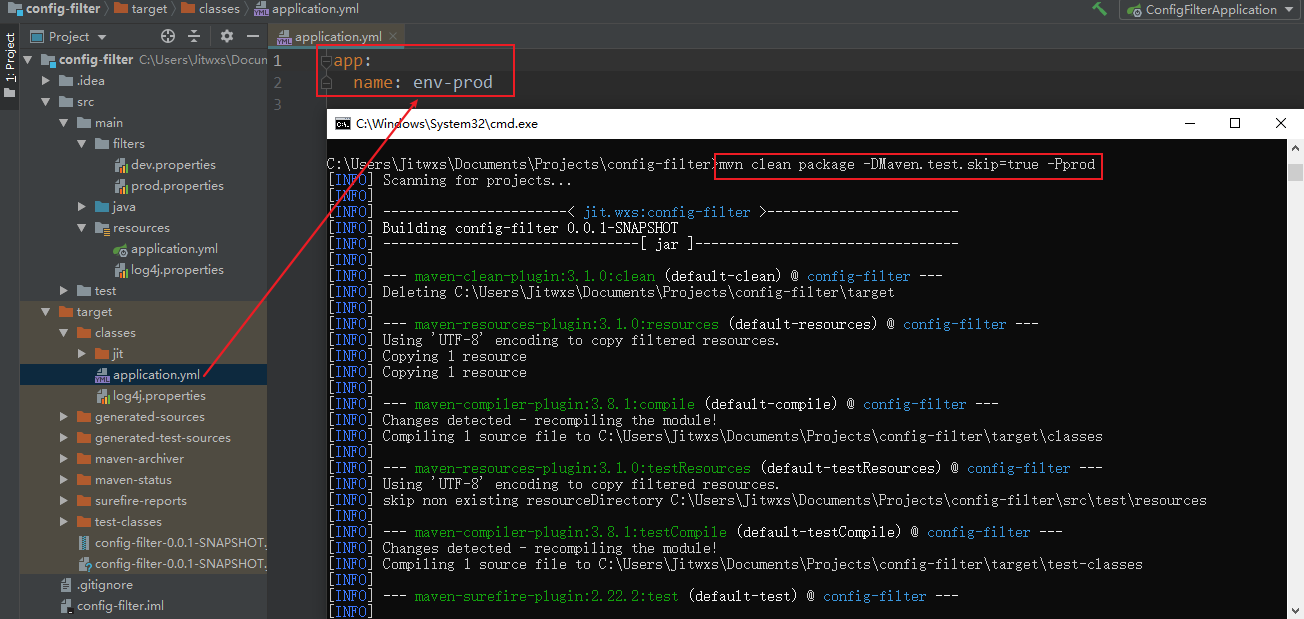
当指定 prod 环境时:
1 | mvn clean package -DMaven.test.skip=true -Pprod |
四、结语
最后总结下 Maven Filter 的基本流程:
(1)不同环境配置一个 {profile}.properties
(2)只有一个 application.yml,属性采用占位符
(3)配置多个 <profile>,<props> 属性指定对应环境的 {profile}.properties 位置
(4)<filters> 指定实际加载的 {profile}.properties 位置
(5)在 <filtering>true</filtering> 的 <resource> 标签中指定 application.yml
